
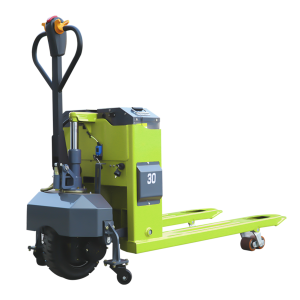
This electric pallet truck wheel replacement guide will walk you through every step to replace drive wheels, load wheels, and caster wheels safely.
1. Pre-Replacement Preparation (Safety First)
1.1 Vehicle and Work Area Setup
- Park the truck on a flat, hard, dry surface, away from slopes, walkways, and pedestrian traffic.
- Turn off the power, remove the key, and set the parking brake.
- Ensure the forks are fully lowered and the truck is unloaded before beginning work.
1.2 Tools Required
- Hydraulic jack or lifting tool
- Socket wrench set, open-end wrenches, and screwdrivers
- Rubber mallet (or hammer with a block of wood)
- Sandpaper, rags, and light lubricating oil/grease
- New replacement wheels (must match the old wheels in size, bore, width, and load rating)
1.3 Identify the Wheel Type
- Drive Wheel (Rear Wheel): Powers the truck and handles braking. Common sizes include 210×70 mm and 250×74 mm.
- Load Wheels (Front Wheels): Located under the forks, these support the load. Common sizes include 80×60 mm.
- Caster Wheels/Stabilizer Wheels: These assist with steering and balance.
Note: Always replace wheels on the same axle in pairs to prevent uneven wear and misalignment.
2. Replacing the Drive Wheel
Step 1: Lift the Truck Securely
- Place the jack under the rear axle, not on plastic or cosmetic parts.
- Lift the truck until the drive wheel is completely off the ground.
- Place safety stands or wooden blocks under the frame to prevent the truck from falling if the jack fails.
Step 2: Remove the Old Drive Wheel
- Remove the dust cap or decorative cover from the wheel hub.
- Disconnect the negative battery terminal first to avoid electrical shorts.
- Disconnect the motor wiring if the wheel is motor-driven.
- Loosen the hub nuts in a crisscross pattern (do not remove them one at a time).
- Once all nuts are loose, remove them and gently pull the wheel straight off the axle.
- Clean the axle shaft and hub surface with sandpaper and rags to remove dirt, rust, and burrs.
Step 3: Install the New Drive Wheel
- Align the new wheel with the axle shaft, ensuring it is facing the correct direction (tread pattern outward, flange flush with the hub).
- Hand-tighten the hub nuts in a crisscross pattern.
- Torque the nuts evenly to the manufacturer’s recommended specification.
- Reconnect the motor wiring and battery terminal, then replace the dust cap.
Step 4: Test the Wheel
- Slowly lower the jack and let the wheel rest lightly on the ground.
- Spin the wheel by hand to check for smooth rotation, binding, or noise.
- Turn on the power and test the truck at low speed, checking for straight movement, smooth braking, and no unusual vibration.
3. Replacing Load Wheels or Caster Wheels
Step 1: Lift the Forks
- Place the jack under the front of the forks and lift them until the load wheels are completely off the ground. Use safety stands to support the forks.
Step 2: Remove the Old Wheel
- Bolted Design: Unscrew the axle bolt and pull the wheel off the shaft.
- Pin and Cotter Pin Design: Use pliers to remove the cotter pin, then tap the axle pin out with a hammer.
- Circlip Design: Use circlip pliers to remove the retaining clip, then slide the wheel off the shaft.
Step 3: Inspect and Clean
- Clean the axle, bearing housing, and wheel frame to remove dirt and debris.
- Check for worn bearings, bent axles, or damaged wheel frames. Replace any damaged parts before installing the new wheel.
Step 4: Install the New Wheel
- Slide the new wheel onto the axle, ensuring the bearings are properly aligned.
- Secure the wheel with the bolt, pin, or circlip, making sure it is tight but not over-tightened.
- Check that the wheel spins freely and does not bind.
Step 5: Lower the Forks and Test
- Remove the safety stands and slowly lower the forks.
- Move the truck back and forth to check for smooth movement, no binding, and no unusual noise.
4. Common Issues and Troubleshooting
4.1 Uneven Movement or Pulling
- Cause: Mismatched wheel sizes, misaligned installation, worn bearings, or bent axles.
- Solution: Replace wheels in pairs, ensure they are installed straight, and replace any damaged components.
4.2 Noise or Binding
- Cause: Dirty or dry bearings, foreign objects stuck in the wheel, or overly tight installation.
- Solution: Clean and lubricate the bearings, remove debris, and adjust the wheel tension.
4.3 Safety Reminders
- Never work on the truck while it is connected to power, as this can cause electrical shorts or accidental movement.
- Always use safety stands, not just a jack, when working under the truck.
- Test the truck at low speed without a load before using it with cargo.
5. Maintenance Tips to Extend Wheel Life
- Daily: Inspect wheels for cracks, chunks missing, or embedded debris.
- Weekly: Spin wheels by hand to check for smooth rotation, noise, or play.
- Monthly: Measure the remaining tread thickness. Replace polyurethane wheels when less than 5 mm remains.
- Keep the floor clean and repair potholes to reduce impact wear.
If you follow this electric pallet truck wheel replacement guide, you can extend the life of your equipment and avoid downtime.